Followers

12/31/2017

A Beary Quilt

Hello- and welcome. Gosh, not many more hours left in 2017. This year has literally just flown by, hasn't it? I hope you are looking forward to the end of 2017, as much as we are in our family.  Praying that 2018 will be a better one for us, and all of you as well. Several of my blog buddies are having Life issues just at the moment, so sending prayers up for them, that all will be well.

We have 2 birthdays coming in January. Was hoping to get a head start on making some cards and not always be rushing at the last minute. Got some quilt dies from Gina Marie, and tucking the pieces in place while watching a tv show, is a good multi-task effort. I use coffee filters when I'm cutting dies like this, to separate the colors & not lose the little pieces. On this die, I learned the importance of checking the sizes of the little bits. Put one in where it doesn't _quite_ fit, and you're gonna not have a well-made quilt (just like in fabric piecing). Used a black mat to frame each quilt after using a white backing, but since I have a dark background for taking photos, the black doesn't show well. Here goes:


The first quilt is for the one SIL that I have left, and she's a quilter (in fabric, hand sewing only). The green pieces are sort of chartreuse green that brightened up the purple and blue snowflake fabric. Also the sentiment is gold foil, but shows up black in the photo. The little bear was colored before the paper colors were chosen, hence the chartreuse used. If you look at the triangles under the bear, you'll see what I mean about checking carefully that each tiny piece fits perfectly  - from the get go. Obviously I didn't on this one. Lesson Learned!
 
Unless using double sided paper, to make this quilt you use multiple colors, so the next quilt was made at the same time. Placing the colors in different formations changes up the design of the quilt. For some reason, the purple in this one looks faded, but the papers were the same in both quilts.


Same elements used here, and this quilt was pieced a bit better. Had fun coloring these bears and was pleased that the matching die cut out the image pretty well. Sometimes I have a problem with that, even though I may have used washi to tape the die in place. It can still shift a little as it goes through the Big Shot.
 
There were enough pieces left from this effort (I used 3 colors, so 3 quilts!) but #3 has more fitting errors than these 2 did. Both the folks who are getting these cards will be forgiving of my boo-boos (I think -[hope]!) The DP came from a 6x6 paper pad, VOS. Used a laser printer to generate the sentiment, then Minc to put gold foil over it.
 
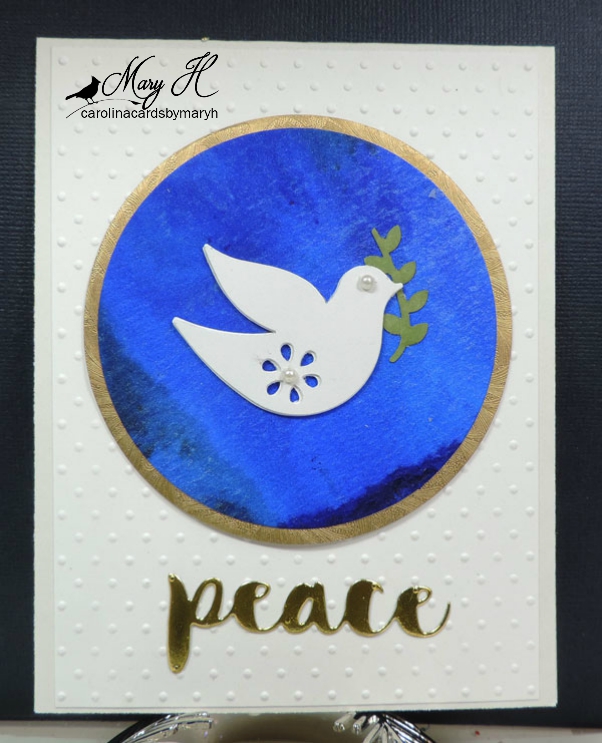
Wishing each of you a Happy New Year, and if you celebrate away from your own home, safe travels back to home. Generally we stay put, might have a glass of wine to clink together, and usually DH will just go to bed before midnight. I'm a night owl, so I'll see 2018 in.
 
Blessings and Hugs. And prayers to those who need to be uplifted. Ya'll come back when you can.


12/25/2017

The Dove of Peace

MERRY CHRISTMAS
 
 
Here's a prayer that your day will be or has been - just the most wonderful and happy day of 2017 for you. I wanted to post a Christmas card made just especially for all those who are so kind to visit here, share sweet comments about the cards & posts I do, and for those who often chat with me by email. Your support this past year has meant so much to me, and helped me get through some tough days. When I would feel down or blue, I'd get an email or a lovely card from one of you, and my spirits lifted. Many times it enabled me to face whatever the next day might be bringing. I know that many of my friends are also dealing with some tough Life's Issues...This thing called Life visits all of us at one time or another. My prayers go out to those of you who are facing these trials.
 
I think I've mentioned here that I seldom watch the news on television. It's depressing, always something unpleasant or hateful, and that's what inspired the card today. It's a very simple card, but expresses my Christmas wish for each of you AND the world we live in.


Background made using Silk acrylic - royal blue as a wash over watercolor paper. While wet, sprinkled Brusho Prussian Blue, Ultra Marine and a bit of white. Spritzed with Dylusions After Midnight spray to bloom the crystals. Let that dry just a bit, then spritzed a pearlized spray for some sheen, with just a little more water to make the colors spread all over the background. I wanted a deep royal blue, and this was exactly what I had envisioned behind this white dove.  
 
- Martha Stewart mega bird punch...5 layers of snippets layered to create some dimension. Added pearls for the eyes (wish I'd left that off!) and the flower center. Leaf twig colored with copics.
 
- Hero Arts Infinity Circles cut the blue background and the outer gold mat. An old Cuttlebug Dots embossing folder for the topper. Memory Box peace die cut from a snippet of mirror c/s that had Stickit backing on it.
 
I was watching Jersey Boys while I worked on this card. Franki Valli & the Four Seasons was the sound of my teenaged years; I really enjoyed the movie and those wonderful songs.
  
Blessings, Hugs AND Peace in your world -  ya'll come back when you have time. I expect all of us can do with a little time off during this holiday season. Thanks for popping in to visit.


12/24/2017

Christmas Rose

Good Evening, and here it is: Christmas Eve. We have some eucalyptus and basalm candles burning, so it certainly smells like Christmas inside. Many long years ago (maybe 40+) DH had one of the then popular ceramic Christmas trees made for me, by a friend of his. This was before we got into ceramics. Surprisingly with all our moving around, the tree is still intact, all the little lights still work, so that's turned on tonight. And best of all, Mr has had 3 good days where he wasn't feeling punk. Yesterday we had a big family celebration at the daughter of Brother #2. Two of his sons were missing, but with the grands, great grands - there were enough people there, to make a lot of noise! Very festive and lots of delicious food too. Tomorrow I'll be doing some food here for DH & me, and think Bro #2 will join us. Brother #1 will be at one of his daughter's - so that's another milestone holiday for each of them to have gotten through alone - but thankfully, not truly alone!

So I've been working on a special card for the Mr. Had gotten aWplus9 Christmas Rose stamp and colored it up. Disaster. It's not an easy stamp to color, even though I thought it would be. First stamped in Memento Toffee Crunch, as I wanted a sort of 'no line' look with pastel colors. (I had looked up Christmas Rose on google to see the color ranges). Worked 2 nights, and it went from bad to worse. My coloring was ok...BUT...the pastel colors looked really washed out. Decided to check youtube to see if somebody had used this image (I knew Jennifer McGuire had, which is where I saw it..but of course I couldn't find that one!) Luckily I found Floral Highlighting with Kelly. Loved what she did so much, I cased it! Now mine doesn't look quite as good as Kelly's turned out, but I was rather pleased with it (so big thanks to Kelly! I'll edit this post later to share my first efforts...)


I didn't use exactly the same copic colors or Distress Ink colors as in the video, and also used a DOX one, but basically I CASED what Kelly did, with immense gratitude. I was getting a little panicky about having a nice card done. I think Mr. will enjoy having it. He always prefers the cards where I've done copic coloring rather than just the die cut ones. I thought about doing some gold spatters, but caution won the day.
 
So Merry Christmas to ALL of you, and big thanks to so many of you who thought of us with the lovely Christmas cards you've sent us. I hope I've shared all of them...and that you've had time to take a peak and enjoy them with us.
 
God Bless, and I hope each of you has those you love best with you tomorrow, and will be able to enjoy the day with splendid health. Family, Love and Health...and remembering the most precious Gift given us so long ago. Hugs


12/21/2017

A Yappy Christmas

Welcome....are you counting down? Have you gotten everything done that you meant to do? I am amazed at the people I know who have their tree up on December 1, all their cards addressed and mailed that first week. Gifts bought and wrapped and under the tree, or mailed in a timely fashion. I was fairly organized when I was working, but I'm certainly not now! Seem to get worse as the years go by too. Oh well, it's really not about the gifts...it's about Christ and family and love, and I'm ok with that.

Had to make this card in a hurry, as I thought I'd be working on it in Florida, and once we knew a little box needed to go in the mail, I had to finish it up ASAP. It's a cute My Favorite Things clear set, and I selected different images from the set to create a little scene. I didn't do any grounding, which - as I'm looking at the photo, I should have done. Some of the red lights were really magenta or orange shade, but got changed to red during the editing process. Used a Gina K red velvet to stamp the sentiment, and that showed up as pink in the photo. Didn't look good at all, so thus the editing..which also changed the things that should have had a more pink hue. Oh well, DD will like the card. It has a dog on it.

Of course copics were used along with an old Snow Writer on the fur of the hat, which surprised me by not being all dried out. Glossy accents on the jingle bell, the ornaments and the star.

Impression Obsession light string die, cut from white c/s, and colored. The Glossy Accents added a touch of gleam to the lights...(there was only one red one, and the round ornament was magenta). The top light (not on the string) was orange, and there were some different shades of orange on the string too. Oh well, it happens. The finished piece was die cut with a S/B scallop die and then used the same die to cut the folded card base.  (oh yeah, in the photo, the dog, tree and stocking stayed as colored!!)

I hope you are able to get in a little relaxation. Yesterday I caught up a bunch of comments from the last 2 posts, watched the rain, and balanced the checkbook. Intended to go to the basement to do some stamp cleaning, put away a bunch of schtuff...the last bit hasn't happened yet.

Blessings & Hugs, and ya'll come when you can.

12/19/2017

Poinsettia Christmas

Hello and welcome. Not too long until the big day. Still have a few more cards to get made that will be hand delivered.

I always make my brothers a special card for the holiday. This year was a little pushed for time, so made all 3 pretty much the same. The image is a clear Avery Elle one, heat embossed with my favorite Ranger Queen's Gold. Colored - carefully with copics. Flower centers were colored with a Pentel gold slicci pen. These are getting harder to find in my area...this is my favorite gold pen.


- The colored image was die cut with a Gina Marie rectangle. Added some Impression Obsession tiny holly & leaves, which were colored with copics, and then a few sequins.  Pretty simple, and I hope they will like it.

Do please check out the Cards by Friends page if you have time & enjoy some of the lovely cards we've received. Ya'll stay cozy and come back when you can. Hugs & Blessings.

12/17/2017

A Happy Birthday Poinsettia

Good evening, and thanks for stopping by for a little visit. We have a dear friend from our days in Florida, who is going to be 100 years old on Christmas Eve. This sweet lady has since been moved out to California by her son, so that he can better look after her, but aside from most things age-related, she is still sharp although due to some falls in the past, she moves about with a wheelchair. She loves to read, watch tv, goes to craft & social functions at the living facility where she resides. So what to make for this special lady? We even looked at Hallmark as I wanted something very elegant and beautiful for her. I was quite disappointed, as all of the cards we saw were humorous or just not suited for this milestone occasion. So, thinking...well, it's Christmas AND her birthday, she likes flowers...poinsettias, right? So here's what finally evolved, and I will say right up front, it looks much better IRL than it does in the photo.


- A Penny Black poinsettia background was stamped using versamark, heat embossed with Queen's Gold.

- White cardstock was die cut with a Tim Holtz Mixed Media die (which I thought I had in my stash; then when I went to pull it from storage, that was not one of the 2 mixed media sets I have! Murphy's Law!) After this corner was die cut, the piece was embossed with a Tim Holtz poinsettia EF.

- A stampendous poinsettia image was stamped with versamark, heat embossed with Queen's Gold, and colored with copics (carefully, as the nibs don't like the embossed edges). I did 2 sets of this poinsettia, adhered one layer. Then on the 2nd layer, used a stylus to raise up the petals on some leaves. Looking pretty good, until I tried to 'deboss' the center, and stylus poked through! Grrr! So first thought of Nuvo drops, but then decided to drop some glossy accents into the center, then add some of the tiny, tiny gold beads (forget what these are called..it's not prills). Of course these little things just go all over, but I managed to mound them up and it dried overnight.

- Sentiment was heat embossed with the same gold on heavy weight vellum. I was going to add 100th between the words, but did not have any number stamps that looked appropriate with the size of the sentiment letters. Inside it references the milestone, and I hope she will enjoy knowing this card was made just especially for her. We've always thought a great deal of this elegant & refined lady and don't get to see her since she moved to California.

Some lovely cards were added to the Cards by Friends page tonight. Are you as intimidated to send your cards to fellow card bloggers as I am? But we sure do get a bright lift to our day to receive them from these sweet people. I have a few more, but haven't photo'd those as yet.

Have a wonderful week, and hope you can find some relaxing time. We aren't real sure we'll make our trip to Florida for Christmas. DH had a procedure to shatter the kidney stone on Thursday, and we're not 100% sure that it's successful. He's done pretty well, but still seems to have some pain at night when he lies down. Still watching to see if anything passes...just didn't feel it was the thing we should do to take a 12+ hr drive, perhaps encounter a problem while away from his doctor and his records. So we're just a little 'down'...but all things happen for a reason.

God Bless. Hugs too.

12/09/2017

Christmas Card Club - Gifts

Good evening and welcome. It's a very brrr-ish evening, and has been a cold day. Had some more snow this morning, but it quit falling, and about noon, the sun came out very nicely. Watched some icicles melt off the bird feeder, and was even brave enough to attempt to add a little food to one of the trays. I held onto deck rails just in case, as I could see the iciness on the snow that was still there. Was very careful, as I've slipped on black ice some years ago, and tore up a knee.

Today is the last Christmas Card Club Challenge of 2017. Our sweet Rita selected Gifts as our theme. Took a bit of deciding on which way to go with this Gifts theme. Recently got a pretty nativity ornament and thought of that at first, as of course that was ever the most wonderful Gift of all. Stumbled onto a House Mouse stamp which I've colored before, and decided to go with that. Here 'tis.


Stayed with the lighter shades when I colored with copics and used some glitter paper to cut out the oval front layer. This is popped up on dimensional dots. The die is a rectangle which cuts a frame, the oval, and an oval frame.  The snow under the mice feet was made with Crystal Stickles, then sifted some Martha Stewart Chunky glitter while that was wet. Just colored the Santa Mouse fur with a white pencil and didn't try to add any flowersoft to this.

Die cut some more gifts from glitter paper.. and will just put the sentiment inside. Done!

Thanks for all the good wishes for Mr. He's had a quiet day. Hope tomorrow is a repeat. Just trying to remind him to drink lots.

Another couple of cards added to the Cards by Friends page, which I hope you have time to enjoy.

My fellow team members' blog links are on the right sidebar. Take a look at what they've shared on this fun challenge theme.

I'm very behind in returning comments, but I promise, I'll do my best to catch up ASAP.

Thanks for stopping in, have a blessed day, and Hugs.

12/08/2017

Thinking of You

Hello again, back with a couple of the snow pictures and a card that had to be mailed today. I'd done the apples to put on a Thanksgiving card, but decided the image would work well on this mica background. Just learned that one of my cousins has a brain aneurysm, and fortunately she got medical attention when the symptomatic headache started. I'm reading more & more - or hearing about folks - who develop intense headaches. These are people who seldom have headaches...then get a very severe one, that doesn't go away with aspirin or Over the Counter stuff like we all use. Then if the blood pressure is checked,  it's elevated. This cousin knew what had happened with SIL, so got a fast appointment to learn there's a problem. She will be getting it repaired next week. I know she's frightened, so thought perhaps a card might cheer her, to know prayers are being said. One of my brothers said "We're all falling apart". True!!!


- The background was made using Saffron Mineral Burst as a wash on 98# mixed media c/s. Then sprinkled some of the red brusho crystals over it. I was careful, as I didn't want to lose the lovely golden color of the mineral burst. I tend to get a bit carried away when I'm sprinkling the crystals, as it's such fun to watch the colors bloom.

Used a pretty EF with a pattern at top and bottom, just for a little dimension. The apples have some WoS on some. This image was a boo-boo. Had colored an image, die cut it, and was trying to sponge an antique looking edge around the diecut. Well, that just made a big mess. Cut out that basket, but stamped another one and colored, die cut. Used the messed up one behind the re-done one, and used a stylus on both images to create a little lift to some apples. IRL it looks nice. Doesn't show in the photo.

- Stitched fish tail banner with the sentiment, remembered to tie a ribbon before adhering to the cardbase, and it's done, mailed today.


Here's some Snow pictures of our surprise today.


Thanks for the feedback on the font size change. I do appreciate all who took time to let me know their thoughts.

Added a pretty card to the Cards by Friends page, which I hope you will take time to enjoy.

Hugs & have a great weekend. Thanks for visiting. I'll try to catch up visiting over the weekend.


Snow!

Hi - Just popping in quickly to say we are having an unexpected snow fall. I had an appointment this morning, then had to hurry home to take DH to the urologist. On the way home, it was raining, which had been predicted. Temperature was dropping some as well. At first I thought "Gosh, that rain looks weird", then realized, it's sleet! Well just a few miles down the road it's "is _that_ snow? By Golly it IS snow". By the time I got to our subdivision it was really coming down, huge flakes. We didn't think it would lay on the ground as the ground was too warm, but here at 5:45, we have white covering the ground. I expect once the temps drop further tonight, there will be ice about. I took some pictures, and when I have time I'll post.

Another reason for the post: One kind blog pal commented the font in black was difficult to read (Thank you! I appreciate the feedback). I tried a couple other colors that didn't seem to me to be any easier to read, so I did make the font size larger. I'd appreciate some feedback as to whether this helps to make the reading easier. I didn't change the font (another option) but just the size. The font is the arial font I've been using, but I'll try another one if it is still hard to read.

Ya'll stay warm. I'm off to get a warm shower as we were out in the chill, and we don't need colds on top of the other stuff. If Mr. doesn't pass the stone (and he may have 2 - in different places..CAT scan shows one in the urethra, but the xray he had today shows one in the kidney) - anyway, if nothing passes by Thursday...he will be admitted for outpatient surgery. They do something called Shock wave something or other which will break up the stone in the kidney so he can pass it. This is as long as the stone is visable on an xray. If it moves, and they can't see it, they have to go upwards - UGH! - with a camera and don't know if they extract it or break it up. Didn't ask a lot of questions as the patient was cringing a lot! Either way he'll be put to sleep, but I guess the afterwards might be worse if they have to search for a stone.

Hugs & stay cozy tonight.

12/07/2017

Birthday Rusty Truck

Good evening, and hope it's been a pleasant day where you are. I hope all my USA friends remembered it is Pearl Harbor Day.

Here at our place, we are dealing with Mr. having a kidney stone (at least we hope that's all it is). Been having a problem since Friday; thought we were seeing his urologist Tuesday afternoon, showed up at the wrong office (a scheduling error by the staff), only for a specimen. Rather aggravated by the seeming incompetence. But it happens. Anyway, early next morning, we had to make a run to the emergency room, as he was in such pain. Had a CAT scan, got some pain relief via an IV drip of some powerful stuff. So got on my TLC hat once again. Hoping he can pass it, so no other procedures will need to be considered. As yet, no stone.

Some weeks back, we were in a Birds & Bloom store, and Mr. saw a neat birthday card. He liked the sentiment, showed it to me, and said "Can you make something like this?" I knew we had some truck stamps, so "yes I can do something like that". The actual card had sort of an old Model T (like the Tim Holtz one) colored as this truck is.

Here's the result:


- Think this is a PSX stamp. First I stamped the truck, colored it sort of like the inspiration card, then tried to mask it in order to create a tree background. Well, that was a big bust! Looked terrible. Fussy cut out the truck; on another c/s stamped different tree stamps from the stash (some were Stampscapes, others were a 3D Spellbinders trio, and a couple of other trees in different sizes using different shades of green). Positioned the truck and saw that I needed some more trees to make the scene look right. Just kept stamping on trees til it looked ok with the truck.

Once everything was in place on the tree background, added glossy accents to the windows. Right before taking the photo, I thought "I should have emphasized the holly berries more", but it needed to get mailed. I'd used some red glitter pen on the berries, but it doesn't show all that well. An old C/B folder which reminded me of the toolbox pattern on so many pickup trucks was embossed on the mat.

This is for our very best friend, and I think he'll like it. The inside sentiment says "But we're still runnin' ".

Do please have a look at the Cards by Friends section. A new card is up, and we received another beautiful one this afternoon. I'm so thankful we have so many lovely people who share their thoughts and skills with us.

God Bless, and if it's nasty weather where you may be, stay cozy. Hugs.

12/03/2017

Backgrounds, Tree, Snippets

Happy Sunday afternoon. We're having a gorgeously sunny & most pleasant afternoon after an overcast & rather gloomy day on Saturday. Today I'll share a couple so-so cards, finished from salvaged bits (snippets) and  boo-boo.

Here's the first - the boo-boo

 
- Background created from mica products(Mineral burst, color burst, pearlized sprays) using #140 watercolor paper. This was the first try with the liquid mineral burst, and I was quite happy with the results here.

Used several sizes of snowflake dies and glitter paper to layer the medallion. Cut the Penny Black die from the same paper, but letters of this die were very tricky to handle. There's 3 layers, and each layer was difficult to get adhered together straight. After it was placed on the background, it didn't look at all as I wanted. After looking at it, took a gold gel pen and outlined around the words, and decided 'that's it'. I hated to toss the pretty background.

Tried this as a square card, and it didn't look right. Used the 5.5x4.25, added a border of gold glitter paper top & bottom, and some SU sequins to cover the join. This is one that may stay in the stash box and get cannabilized for something else. Not real happy with this die either...too fussy to have to work with (for me anyway!) It's a very pretty font on the die though.

- this one is the Snippets one! The tree was cut from a ?Hero Arts? die that cuts the tree shape and the little branches, which are then lifted out from the surface. Used a mica created background for this, then rubbed some Nuvo Mother of Pearl mousse around before lifting the branches. The Nuvo MoP. had been closed properly, still has the inner seal, but it had dried out quite badly. I'm wondering if spritzing a little water into the container might rehydrate...anyone have any thoughts on this? I'd only used it once before, but it's been a while. I had a problem with the small pots of Inca Gold old formula some years back.Wondering if the mousse is going to give me similar problems. It does give a nice sheen though.

A snippet that had a circle die cut from it, was handy and another piece that had some embossing paste....used the cut out as a stencil atop the paste piece, and sponged various shades of dark blue to create a night sky. I was trying to create a way to use the tree, as that was the jump off point for this card. Added some white gel stars. Torn paper with Sparkle n Sprinkle Twinkling Clouds spread over liquid glue to create some snow drifts. Decided to add 2 little Art Impression birdies, and the sentiment. Done!

Now for just a couple of the Thanksgiving cards that got made, but not mailed in time.


The next 2 were sponged DOX & embossed background. The image is an old Art Impression cling that I have always enjoyed coloring.

Still have a couple more Thanksgiving cards I may share, where I was experimenting with the Whitewash technique.

Thanks for joining me this afternoon. Hope that you had a good weekend, and ready to tackle the  seasonal rush that is beginning! Hugs & Prayers.


11/30/2017

Dry Embossing Christmas Trees

Good afternoon, and thanks for stopping in. Hope you've been having a good day, and enjoying whatever it is that you might be doing.

Here's another background card from playing with Ken Oliver Mineral Burst and other products, using mixed media card stock and a Sizzix 3D embossing folder. This time the background dried overnight, was dry embossed with this folder, then  spritzed some different mica sprays over it. I'm trying to teach myself to keep the sprayer about 18" or more back from the card surface. I've been finding if I spritz, let dry well, then emboss, the piece still doesn't feel the 'hardness' to yield as good an emboss result.

Had some bits & pieces from previous backgrounds, so they got pulled into use for this card too.


The Impression Obsession die cut tree was cut from a snippet of created background. Used the foam tap that comes in a 'line' form (rather than the squares). Cut into skinny pieces to be able to pop up the tree. Colored the tape with a copic so it was not so visible from the side. I was trying to position the tree trunk between the raised letters, so it's not evenly placed; hence the sentiment out to the left side. Hoped to create a more balanced look. Thought this worked with the embossed sentiment. The sentiment was cut from 3 layers of snippets, and is from an Echo Park die set. Snippets were just big enough for the die to fit - the 2 back layers were from a messed up Halloween scene. Goes to show, those little bits come in handy :-).

Ya'll have a wonderful afternoon, big hugs.


11/29/2017

Spiral Christmas Tree for Rudolph Day

Waay Haay! Finally, have a simple card ready in time for Rudy Day. In case you don't know about Rudolph Day, it's hosted by the very fabulous Scrappymoi (Maureen), is open every month from the 25th to the end of the month, and the only rule is that the card have a Christmas theme. Pretty simple, yes?

Have been playing with some products, making a few backgrounds if I had a little time and was in the mood. So today's card is the product of those efforts. Found a Sizzix 3D EF at the local Hobby Lobby, had a coupon, and well, you just couldn't not buy one, right?


Background made from sponging DOX in blues and lavenders, with some iced spruce to tone down the colors just a tad. Sprayed some pearlized water over this and dried overnight. (A tip: Do the embossing and _then_ spray with the pearlized stuff...; tried that next time and that seemed to work better for me)
One caution on these Sizzix 3D embossing folders: Check the sandwich with _your_ machine, as it would be easy to break the machine. After a few efforts and the machine felt 'too tight', I just opened  the tabs on the multi-purpose platform, put the EF down with no bottom plate; added a shim from some saved die backing (like you get the S/Binders dies on), added the top cutting plate. It rolled through with no forcing and I still got a nice impression. It was not the sandwich suggested on the Sizzix package.
 
Impression Obsession Swirl Tree die cut from another play piece made from Ken Oliver Mineral Burst, colorburst crystals and pearl spray.
 
Sentiment from an Echo Park word set, cut from the same tree paper... used some snippets from other spray pieces to make 2 more layers to add dimension. Added Glossy Accents after this was adhered, then sprinkled some white glitter over the wet. It's quite bling-y after drying. Did the same on the star as well.
 
Very simple to do with pieces handy. So now I'm off to join some lovely folks over at November's Rudolph Day Challenge.
 
Didn't include links to products used, but if you are interested, will happily try to provide the info.
Thanks for joining me, and have a wonderful blessed day! Hugs


11/25/2017

Christmas Card Club - Mixed Media

Hello and welcome to a Christmas Card Club post. This great group of cardmakers have a challenge every 2 weeks, and one member selects the challenge for that week.  I've not participated in a long time due to all the family things we've dealt with for a while. However, since I picked this week's challenge, I felt honor bound to try to get something ready to join in. (hanging head in shame for being away from my CCC pals for such a long time. We're praying that 2018 will be a quiet year and we can get back to our normal routines once again).

So here goes:


- Ken Oliver Metallic Sky Mineral Burst applied to Mixed Media c/s. This is a liquid product that spreads easily as a wash, and is a gorgeous blue. It can be mixed with acrylic paint and other products, and Youtube has some good videos on it. While this was wet, sprinkled Color Burst Osta Blue and some yellow Ken Oliver Color Burst (more powdery than the colorburst crystals). Spritzed some pearlized spray over the surface to help the crystals & powder bloom. After using a spritz tool to blow the puddles around the card surface, let this dry well. This certainly doesn't look as though it started off blue, does it?!
 
Stamplorations Christmas Tree stencil used with Golden Glass Gel Beads to create the dimensional tree. It's been a while since I used this product, and left it a bit thicker than it should be.
 
Let the piece dry overnight, trimmed down. Added 2 mirror gold strips to each edge. A Memory Box tiny snowflake stencil used with pearlized texture paste to add dimensional edges at the sides.
 
- Echo Park die cut from the same gold mirror paper. Remembered to use double side adhesive to the c/s before die cutting. Usually think about that as I'm tediously applying glue to the letters. Recently got a Penny Black O Holy Night die, tried using it, and the slender shapes of the words made it very tricky to glue & put in place properly. (that was the first card I meant to use today! May share it later, but needs some TLC first). Added a few little bits of color around, and called this one done. Mixed media is always fun to experiment, even when it turns out not like your first plan :-)
 
Please do visit my fellow team members to see what beauties they shared today. You will see links to each member's blog in the right sidebar.
 
Would encourage you to check out some new Thanksgiving cards shared on the Cards by Friends page as well. We were so blessed to enjoy these gorgeous cards by such sweet friends.  
 
Also would like to extend a warm welcome shoutout to a lovely new follower, Mac M. of The Sweetest of Peas. Thanks so much for becoming my newest follower. It's been a while since I have been able to make some new friends, so I was delighted to see your name in the lineup! Do check out Mac's work...you'll enjoy it, I promise.
 
Thanks for joining me today, and I'll try to get back to post a couple Thanksgiving cards that were made, but not sent. I seem to be developing a very bad habit with that! Certainly need some improvement on the Christmas cards!!
 
Hugs & God Bless.


11/09/2017

Mixed Media Fall Birthday

Good afternoon and welcome. We've had several days of overcast & dreary, with some much needed rain. Had to be out of the house on these days, and the temperature felt a lot more chilly than it has been todate, so I guess Fall is officially here in our area. Still have "things" going on, but more the normal day-to-day stuff - thankful to get back to that kind of day.

Neighbor has a birthday coming soon. A few afternoons I did a little experimenting play with some Ken Oliver Mineral Burst  product, Silk acrylic paint, Distress Oxide Ink and colorburst. Used some of these backgrounds for this card.


- Background for the leaves (Pretty Pink Posh Stitched Foliage) was made first. Spread Copper Mineral Burst on watercolor paper (think it was #140 weight). Added some Silk acrylic paint in a gold color (sorry don't remember specific color, but the link will show the texture of this product). While the paper was still quite wet, sprinkled on some yellow & leaf green shades of colorburst, sprayed a little water and let it spread. This piece was quite wet, so placed another w/c on top of it to absorb some of the wetness, and got a two-fer. Let this dry overnight, and then die cut the leaves.

The card background was done using DOX inks -  (just got some fall-ish colors and played with sponging). Used a mister to spray droplets, and then sprinkled some leaf green color burst over the surface. Sprayed again to get the crystals to spread. Once dried, used a Darice Fall EF to dry emboss. Picked this particular one because it had the maple and oak leaf patterns in it. Since the embossed Fall is part of the design, decided to just do the birthday bit on the inside. A S/Binder label die cut a cream snippet of C/S for the interior sentiment, and added one of the oak leaves as well. Thought this turned out ok, and I think she will like it. Used Nuvo Crystal Copper to add the pearls.

There's a new Halloween card added to the Cards by Friends page and also added the DOX definition to the Blog-a-nition page. Saw that used on a blog and don't remember where so as to give credit. Seems easier than typing out Distress Oxide Ink every time it is used!

Here's a couple pics of our Halloween night. We had about 15 kids; some were tiny & adorable. Some were too old to be out after candy. One delightful toddler was fascinated with the lighted ceramic pumpkins and wanted to stay to talk with them. Her parents had to coax her to come collect her candy from where we were sitting in the swing. As she left the porch, she said "Bye Bye punkins, thank you for the candy". She was about 15-18 months old and was the star of the evening.  We had made the pumpkins long, long ago when our daughter was very small. We both worked, so she wasn't able to stay after school for a ceramic class. She was so disappointed that we decided we would go as a family to a ceramic shop to take classes, and that's when we made 3 pumpkins. The owner's husband was DH's friend, so they let us come at night when the day's kiln firing was being done. That's another expensive hobby we got into, buying a kiln, all the supplies. Years later, donated to another person who was getting involved in the hobby.   After it got dark, these pumpkins really showed up quite spookily.

 
My own little pumpkin sitting in the swing ready to hand out candy. We moved the mums off the steps to avoid any stumbles. It got dark right after I took these pics..came down quite rapidly and was a bit chilly too.

Thanks for popping in to visit. Wanted to catch up on all my previous post's commenting before I did another post. Ya'll have a great afternoon and come back when you have time, heah?

Big hugs, God Bless.


10/31/2017


HAPPY HALLOWEEN


Welcome and a Spooky Halloween to you! Thanks for checking in and I hope you're planning a special day. Do you hand out candy tonight? We normally buy a couple bags with the items individually wrapped or sealed. The past few years, we've varied from having lots of kids to just a few, with candy left. Surrounding areas frequently bring kids in cars to our neighborhood as well. We don't need to eat the leftovers; it's hard to find places to donate it to (safety reasons, even if the places know who we are & the bags are still sealed); the neighbors all have their own leftovers to push on their grandkids. One year the ladies in our doctor's office told us "We can't give it to the kids, but WE can eat it". So this year, we just got one big bag of candy bars, and when it is all gone (if it is!) - we'll turn out the porch light and hope we get no tricksters.  We both enjoy seeing the little kids, but sometimes we get ones old enough they should be buying their own candy. Most of them seldom even say "Thank you" either. Still, we do it for the littles.
 
OK...another card that didn't get an insert made, so guess it will go in the stash. Hope I remember this next year and mail some out in time. Also hope next year will not be so stressful as this year has been.
 
The Gina K die cuts the stitched scallop piece, with a separate frame. Colored that green, inlaid the scallop back into the rectangle. Adhered that to a kraft card base, which I then covered up with angled strips of different Halloween themed dp.  I was chuckling as I colored the image, at that kitty's goofy look. (I'm very allergic to cats, so I seldom do cat images! Once in a while though.)
 
Big hugs, and thanks for visiting. Hope you don't get any tricksters tonight.


10/30/2017

Happy Halloween Punkin Pair


Good morning and welcome to a scheduled post. Trying to get some things caught up. I made a few Halloween cards - alas, never got time to do the inserts in time for timely mailing. I have become the Excuse Lady, sorry! Last week we spent a couple days helping #1 brother clean out a utility room. (Mostly his help was when we showed him the stuff, he'd say "pitch it" and some of the stuff he thought neighbors might want. )  We still have some of that to finish, in addition to an outbuilding that contained SIL's gardening equipment. It really brought home all the 'stuff' we collect, know we should weed out-- but don't want to face the chore. Perhaps doing these things has contributed to my cleaning mood of late!

Anyway, I thought these lil' punkins were cute, they were fun to color. Don't remember the stamp company. Stripe paper from a 6x6 pack - who knows when it came to live here. S/B label die. The orange cardbase is a bit smaller than the usual, but it was on the desk. MS punches from black c/s and some WoS applied. Think the die cut sentiment is a M.Box, 2 layers of black c/s, then 2 layers of a snippet of yellow d/p that had a pattern. Thought it would work as a shadow outline, and it did!

Hope ya'll had a nice weekend. Ours was quiet, overcast, rainy at times, and we both took a long afternoon nap each day, as we were tuckered out :-).

Added some cards to the Cards by Friends which I hope you have time to check out. And here are the pictures of the front porch and some of our pretty fall trees. Some are turning into the autumn colors, but a lot are still fairly green. In one picture the azaleas off the side of the front porch still have blossoms. Normally they would be in their fall state by now...ditto on the crepe myrtles in the front flower bed. Those have lost the pretty magenta color blossoms we enjoyed all summer, but leaves are not the fall/winter brown as yet. Those leaves will brown up, wither and blanket the mulch under those trees.


Hope you enjoyed seeing our part of the world. Thanks for popping by and come again when you  can. Blessings and Hugs.