Followers

2/28/2015

DeeDee's Digis Friends Forever

Good evening on this last night in February 2015. Gosh is this year speeding by or what? We've had 2 snows and tonight we're told to expect some freezing rain to move in around midnight. I'm ready for Spring!

Our DD & SIL were up last week for a few days....it was lovely to see them, but the occasion was to close on the sale of their house up in our area, and supervise the movers in emptying the house. We're pretty sad about it, as we had so hoped SIL would like his job here in SC and that DD would move up here. Not to be. He has accepted a job in Seattle, Washington, and we really hope she'll stay in Florida where she will be closer to us. That's life. Sometimes I have a hard time accepting things.

Anyway, this cute digi from DeeDee's Digis has been in the works for many days, and I just couldn't get my mood up to go work on it. Finally finished it this evening, and the construction is a first attempt for me. I've received these 'flip' cards (I guess that's the right term), but I had never made one. So please be kind!  :-D  This was the digi of the month for February.


- the orange stripe background was made using Yellow, Orange and Light Brown Brusho crystals on Bristol Smooth W/C paper. Once it dried, used a MBox stencil and some Viva Modellier Crème (904 - a copper paste) to get some dimension & texture - thinking tiger stripes, ya know?

- trimmed this stripe piece to the size needed, adhered temporarily to the brown card base, and die cut the opening with a Sizzix die (no name, it was part of a magnetic platform purchase). Made sure that the die size used was the next size up from what had cut out the digi pieces.

Prior to permanently adhering the stripe piece to the brown, used a couple drops of Glossy Accents to glue a piece of dental floss top & bottom at the center of the opening, and on the brown base. Once that Dried, glued the stripe piece down permanently.

- Added tape on the front die cut of the tigers, and laid it over the dental floss so that it was centered, and then applied the back side of the tigers - and Voila, it did flip back n forth when the front is open. (and yes, the floss came out from the top and I had to figure out how to get it inserted back between the edges without destroying the card!) I have lots of practice yet to get this technique done properly!


- Two prints of the back image of the tigers were printed. One was die cut. Found a piece of thin wood paper and used a portion of the die to cut it to cover what is on the bottom of the digi. I wanted my tigers setting on a piece of wood as they thought about Life. Glued it down, held it with tiny clothes pins until it seemed stuck pretty well. Had fussy cut the 2nd tiger image, so that the tails would be hanging down over the wood; glued that fussy cut to the 1st image to form the flip piece.
 
- Sentiments are from the same DeeDee's Friends Forever set.  Used a S/B label die to cut out the front & interior sentiments, another Brusho background for the front sentiment mat, and the interior background as well.


Inside of the card. I think I will take a brown copic and cover up this white that is showing in the aperture (at least in the photo...guess I was struggling with the construction of this one, that I didn't notice the white at first!). Also didn't know how to add the inside sentiment w/out it showing from the front. Advice anyone????
 
I've been having lots of fun with the Brusho-s. Also had some fun with this cute DeeDee's Digi. Alas, I didn't get the card finished in time to play in the February month's challenge, but maybe next month! I hope you'll have time to pop over for a visit at DeeDee's Digis. I'm certain you'll find some images that you will just fall in love with!
 
In the meantime, thanks for joining me this evening. I hope you'll like my experiments, and now Mr. is downstairs with our Saturday night pizza, and I'm off to enjoy Mr. & Tom Selleck. What more could a lady ask for on a cold Saturday night????Big Hugs & God Bless. 


2/25/2015

Rudolph Day #2 - February 2015

Good Morning & welcome to Rudolph Day #2 of 2015. Just in case you may not know about Rudolph Day, (or as I sometimes call it Rudy Day), our very own Scrappymoi  has taken over as the Challenge Hostess. This month there is a Memory Box border die prize for the selected winner. Here's a recap of the easy rules to enter this challenge. Get a jump start on all those Christmas cards you'll be needing, and perhaps win a lovely craft goodie.

1. Rudolph Days will start monthly on the 25th and will close on the last day of the month.
2. The theme is always an Anything Goes Card, as long as it is Christmas themed.
3. One entry per person and you just need to make one Christmas card.
4. You may combine your entry with other challenges (maximum of 10 in total).
4. Prizes will be shipped anywhere in the world.
5. The winner will be selected by random draw and announced on the first day of the following month.


So let the February 2015 Reindeer Games begin!


- Impression Obsession (F10007) image. Colored with Copics & WoS pens. Gold outline done with a Pentel Slicca .25mm gold pen. One of the best metallic pens I've used to date - which I've discovered is no longer being produced. Bummer.  Copic colorless blender dabbed spots on the brown body, to create a little texture on the deer's coat. Gold Pentel pen on the antlers.

- S/B Marvelous Squares - distressed around the edges with DI dark blues after using BG0000 on the background. Used the inner rim of the die to trace an edge with the gold pen. Added 'snow' with white gel and Sakura silver star pens.

- MS border punch using gold & blue mirror paper. Found the gold paper in Hobby Lobby in the poster board section...huge piece for $1.19. It's not very thick paper & was quite a large piece. Decided to try to see if it worked like the expensive mirror paper...and it did.

- Sizzix THoltz Alteration Thinlet Word Dies  for the sentiment - cut from a snippet of the gold poster board left from trimming large piece to get the punched strips.

- Corner deer were cut from a piece of dimensional trim from VOS stash. Blue star pattern card base also VOS.

Thanks for visiting today, and do come again when you have time! Big hugs.

2/19/2015

Cheers Flowers

Welcome on a frosty afternoon. We have some Artic air today; don't think our temp will even reach 30F. But the sun is shining & we can stay cozy inside, so that's ok. There will be a new card added to the Cards by Friends page, so if you have time, check it out.

Here's the card shared today...had some fun techniques on it (Yippee, the Brushos worked a bit better for me, thanks to Shirley for taking the time to email with the procedures she uses to achieve some stunning backgrounds.) My 2nd play with the Brusho-s worked better than my first attempt. Also thanks to another sweet cardmaker (Loll) who inspires me with all the techniques she shares, I used some Golden's glass bead paste. (Loll has a fantastic card shared today with this product..fun, fun) You'll be seeing some more of my experimental play in the near future.


- Stamp Doctor images (2) purchased at the recent stamp show, inked with 2 peachy colors of Fluid Chalk Inks (product pictures below), then 2 green colors for the foliage, stamped onto Bristol smooth watercolor paper. This is a 2 step stamp, using the solid piece on the 2nd stamping. One must be aware of the ink shades used for each stamping, and it was fun experimenting to see the different results. Thought about doing some further copic shading, decided not to. The stamps do the shading.

- Lil Inker Stitched Rectangle die; used a Judikins shaving brush tool to lightly add color to the edges.

- Brusho background created on same Bristol paper. Wet paper very well, sprinkled  Lemon Yellow Brusho crystals; watched those spread for couple seconds, spritzed more water; then used 2 different Brusho greens (think it was sea green and leaf green), spritzing between each color as the crystals were dropped. Also made sure to keep the paper quite wet. First attempt with this product on this card, I wet the w/c paper, but didn't keep spritzing to keep the surface wet enough. Lesson learned, and thanks Shirley!  Die cut this with larger Stitched Rectangle from the same set (center portion is removed).

- Golden Glass Bead gel applied through MB Mesh stencil, let it dry. Not sure if the photo shows the iridescent sparkle on some of the gel paste when it dried. First attempt with this product. The image & mat were adhered to this piece (which was a snippet as it happens - had messed up a card, and this was the back piece that didn't get trashed).


- Elizabeth Craft sentiment die, 3 layers from same Brusho piece used for the background. (a snippet!) Glue the layers together, add to the card.
 
- Scor-pal for top & bottom lines on card base, just to add a bit of definition. I had loads of fun with this card. Oh yes, the ribbon was a seafoam green, but used copics to darken it to a more compatible shade with the foliage.
 
Since it's been some while that I had a chance to pop over to the Snippets Playground and give my little buddy Parsnip a big hug, I'm headed over that way. Don't you have some snippets to add to a card, and c'mon over to join in the fun for Week 164? I'm sure you do - Let's Go!
 
Thanks for joining me this afternoon. Hope you're staying warm where you are this afternoon, and big cyber hugs to all those who've been ill or maybe just need a hug. Come again when you can.
 
Edit: Just discovered this card will (I hope!) fit the bill of fare over at Happy Little Stampers for the February challenge...I've been wanting to play along, so I hope this will qualify!
 
Edit 2: a sweet blogger (Anita) gave a heads up that this card works over at Color Throwdown #330 & Simon Says Stamp Wednesday, Add a Little Texture. I've never submitted anything at either of these places, but hey, I'll try! Thanks so much Anita!

2/17/2015

Hello on a Snowy Day

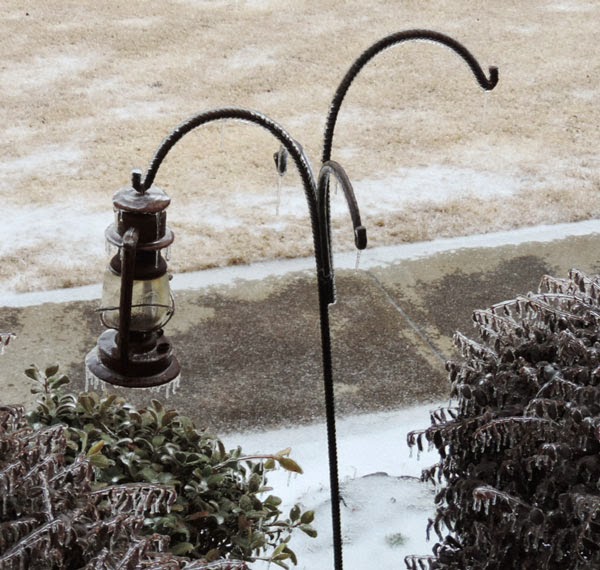
Good afternoon from snowy South Carolina. Our little winter mix started yesterday evening, and by dusk our deck was white (just a dusting). This morning the trees were so pretty with the ice glistening from the branches, and the bird feeders had long icycles hanging down. So odd to see the cardinals perched on the rim, chomping away, and looking out through bars of ice.

Here's today's card, and then will share some of the pictures I snapped this morning.

 
- PB Embrace wooden stamp, colored with copics, added some Glossy Accents on flower centers, butterfly & the elephant's pink nails.

- S/B Oval Bliss die

- Sweet Cuts elegant Leaves die flourish cut from a snippet of green, as was the Elizabeth Craft Hello. That was cut from snippets of the same green, top layer was a white snippet, and colored with a copic. Added Glossy Accents later, so it has a nice little shine.

- EK Success punch for top border; SU flower punch made the flower, which was cut from snippets of the paper that is on the front of the card. A YR copic edged the curled blossoms.

- 6x6 paper Graphic 45 pack- front & back of the same sheet, cut 5.5x4.75, then cut from corner to corner. Remaining pieces of that sheet worked for the border punch and the flower.

Here's the ice pictures from around our house this morning.


Was able to step out on the front porch to take these snaps. Tried to take some of the bird feeder & its icycles, but the kitchen window screen blurs the closeup photo, so trashed those. If I'd gone out to the back porch to get a shot, there's screening there as well, and no way was I chancing walking down steps and into the snowy- probably icy too - grass to get a better angle. Learned my lesson about black ice a couple years ago!

Hope you're staying cozy & warm. Compared to what some of the states are getting, this is nothing...but it's Big Deal for our area!! Lots of power outages according to the news. Not much traffic on the road in front of our house today, but some brave souls did venture out. Glad we didn't have to!

Thanks for surfing in, big Hugs!

2/15/2015

Christmas Card Club Challenge #4 - Snowy Trees

Good Morning, and welcome. It's been 2 weeks since the last Christmas Card Club post, and today it was my turn to select the challenge theme. When we lived in South Florida, I missed seeing the different varieties of trees. In South Florida, it's pretty much different species of palm trees and pines. Occasionally Live Oak trees with Spanish Moss.  That prompted my challenge choice (plus I thought everyone might be a bit bored with my cardinals!). Here goes:

Had a Penny Black clear set Nature's Friends that was handy& a NBUS. Started sponging a sunrise sky, after masking out a circle for the sun. Moved on to the snowy ground...ok so far. Stamped some solid trees from this set, then the tree overlay in the set. Added some glue in spots on the trees &  hills, then sprinkled over some SnS Twinkling Clouds to add snow texture. Impression Obsession tree die cuts in different sizes & shapes, using snippets of white c/.s to vary the tree look.  Rubbed Memento Olive Grove dew drop size around on the white tree die cuts, leaving spots of white.

- Gray Whale Colorbox Fluid Chalk stamped the foliage stamp from the PB Nature's Friends, got a very nice snowy effect.

IO deer trio cut from white c/s snippets. Colored buck & fawn with copics,  the bird perched on the foliage became a red bird.

added 2 bunnies cut from white snippets. Gray Whale ink applied directly to the bunnies, leaving some white fur. At the last minute, used 2 of the flying birds from the PB Nature's Friends using the Gray Whale, but thought 3 birds would be a more balanced look.

Am debating on adding a die sentiment, either Peace or Joy - but deciding where to place it. Did not mat this card, just left it as a scene, because the winter scape is already larger than my usual card size!

Do please check out my CCC team members' interpretation of today's challenge. Blog links are on the right sidebar. Also there's a new card added to Cards by Friends page.

By the by, we did have a wonderful family meal at Olive Garden last evening. Even though we arrived at 4:30pm, we had a 40 minute wait. When we left the restaurant about an hour later, we were told the wait name list was above 50! So we got there at a good time. Zuppa de Tosca, the salad and the garlic breadsticks were Mucho Delicious!

Ya'll have a wonderful day, and come back when you can. Hope your Valentine Day was as nice as mine was. Big Hugs.

2/14/2015

Happy Valentine's Day

Hiya, and welcome. Big Hugs & lots of good wishes that each of you will have a super happy day spent with your Sweetie (and family too), and that it can just be a very loving day. I wanted to post a Valentine to all my wonderful followers along with the above wishes. Also will finish sharing the rest of the V. cards that I did.


For all who visit here today! This one's for you along with some big hugs.

Now for the rest of those heart cards:


(looks like the silver trim is coming off in this photo. I did press it firmly back down prior to mailing this card. The interior red backing is from a snippet of Gelli play with some sprays over it. Didn't photo all that well, as it does not look orange-y IRL. )
 

There, that's all until next year. Don't think I've posted any of these cards twice, but if so, please overlook it.

It's sunny here in Upstate South Carolina this morning. Windy though & quite brisk. We watched some tiny yellow finches at the bird feeder this morning. Each day their coloration is changing from the dull of winter to their spring feathers. Also saw quite a few of the finches with red heads...which are called purple finches in our area. Dunno why ...but that's what the locals tell me these are. DH just went out to shake up the Nyger seeds..they seem to be ignoring that in favor of the sunflower seeds. He thought perhaps their feeder had clogged. We'll see if they go back to the Nyger. It's too expensive to waste!!!

Have a grand day. Stay warm. (we're going to Olive Garden this evening for some good Zuppa de Tosca (potato soup) and the O/G salad. Not all that romantic as far as a restaurant goes, but we both like the food. My #2 Bro & SIL are going with us). Big Hugs.

2/10/2015

First Zentangle Try

Good evening, and welcome. Please help me say a big warm welcome to 2 new followers:

Em Louise of Creative Em

Thanks so very much for choosing to become followers here. It's so exciting to see new faces appear in the followers' list. If you want to see some stunning use of one of the recent blog candy prizes, take a look here: Shona's Stamping Stage: Valentine Love. Shona created a super stunning card with some of the goodies that were sent along, and I was so pleased to see it.  Do check out the superlative card Shona is sharing.

Additionally I will be sharing a lovely card we received from Brenda W of Inkspired to Stamp, with her first Spectrum Noir marker effort on a stamp that was in her candy package. Folks, she did an amazing job. DH said "You ought to show her the first one you did". Well, NO I'm not! Will share Brenda's card along with some pretty Valentine cards we've received - so check out the Cards by Friends tab at the top & enjoy.

Now, I have a few more Valentine cards, but have decided to share them all in one post, and just show the cards with no blather. Today I spent catching up bookwork, (the dreaded Visa bill arrived from my Heirloom Stamp Show shopping trip, and I'm feeling very guilty seeing how much was spent & feeling quite poor! Don't worry, as soon as the bill is paid, I'll get over it!). Also spent the afternoon trying to catch up on comments that have arrived for my blog, and now I need to spend some time visiting a couple of challenges I entered.

One night while vegging in front of Blue Bloods I found a die cut heart that had been used as a template (back of it had messed up stamping). Decided to finally try doing a little Zentangle doodling. Folks, it's harder than it looks - and no I did not hunt up any of the books bought to try to learn how. Got out one of the Copic Multiliner pens and started to doodle. So don't laugh! (well, OK, you can if you want to- I won't mind- really).

Here it is, placed  on top of that problem paper used on 2 Valentine cards. Hopefully you can see the slubs in the paper that make it look as though it is a pretty raw silk fabric.


Started the Zen with 3 zigzag doodle lines down the heart shape, then just started doodling more lines on the blank space between the heart edge and the first ziggly line. Then moved to the next one. You know what was hard for me? Trying to decide what the heck kind of line to draw! It ended up looking way too 'busy' for my eyes, but who knows, may find the books, and give it another try. It's a good way to be a bit productive while wasting time looking at Tom Selleck!
 
Ya'll have a good evening, and come back when you can. Always love to have my lovely visitors who are a joy getting to know. Ya'll stay warm. Big Hugs


2/08/2015

PB - Rose Bouquet Valentine

Good morning, and welcome to my world. Back with {sorry} another Valentine...this time a pretty Penny Black bouquet of roses. Have you ever colored an image, then started making a card, and it would seem that everything that you added to it, just didn't seem right. You'd leave it, look later, and think "What if I tried.....?", well this is one of those!


- PB Slapstick Cling - Entwined.  Die cut with an oval and DI smudged around the edge.

- Sue Wilson die was split into 4 sections to add some framing.

- C/B Geometric Rings E/F. This was the first effort with the satin paper, and the top edge had quite a bit of the red color come away. You can see specs of it around on the paper, as though it has been sanded. This is just from the embossing. Covered the worst at the top with a shiny red ribbon.

- Black c/s mat, white card base. Bit larger than my usual A2, due to the size of the SW die cut. This one will need an envelope made for it.

- Little Yellow Bicycle sentiment cut 3 times from a black snippet. Layered and used Ultra Thick Embossing Enamel (UTEE) to make it shiny. This one will be sent to someone who is sweet enough to overlook all the boo-boos!

Thanks for joining me today. I'm going to schedule a few posts - sorry they will be Valentine cards too - so that I can catch up on commenting, and also putting away a lot of stamps & dies. Next up will be a few St. Pat's and then on to some Easter cards. This year is just flashing by much too fast. Ya'll take care, and big Hugs.

2/07/2015

A Butterfly Valentine

Good afternoon and hope that so far your Saturday has been grand. We have sunshine, warmer temperature, but some howling wind now & again. Still in the throes of Valentine production around here, but managed to get one that might qualify over at Mrs. A's Butterfly Challenge. Challenge #23 has a Letter Theme -  V for Valentine, but must also have a Butterfly. Hmmmm.

Here's my interpretation of this fun challenge.


- satin like texture red paper (Michael's - Speciality paper section - on sale). Embossed with C/B Geometric Rings. This was very pretty paper - but did not take embossing well. At the edges, some of the paper lifted from the core. Had embossed another piece that was much worse with the 'lifting', so on this one, placed a 2nd sheet of plain c/s on top of the embossing side, and it worked a bit better. Not sure if this happened due to the paper or that the folder embosses deeply. Just sayin'.

- Prior to embossing, die cut center heart with S/B D-Lites Swirled Hearts. Added a Fiskar Heart Punch shape from a snippet of the satin paper & larger center pearl.

- white lightweight glitter paper behind the Swirled Heart cutout.

- Ellentina Butterfly die (purchase from the Heirloom Stamp show that cut very well). Bottom layer is plain red c/s, 2nd layer is red satin paper. Top white glitter layer is placed slightly off-center & wings lifted. Red rhinestones for the head & body.

- Had already adhered tiny pearls before deciding to add the butterfly, so it looks as though the antennae have pearls...not really!

Thanks for looking in this afternoon and off we go to link over at Mrs. A's #23 Butterfly Challenge.
There's still time to jump right in and play along! Big Hugs.

Edit: Just got a heads up from Miss Pixie  that this fits the current challenge over at Cuttleburg Mania: I{heart} you, so will link up for that challenge as well. Thanks Diane!

Edit #2: Another sweet blogger reminded me that this card works for the Allsorts Challenge Blog too, the theme of which is Love is All Around. Thanks so very much, Miss Brenda for the kind shout-out! I have such lovely people who visit here...gosh, I wish I could just meet each one of you in person one day.

2/04/2015

DeeDee's Digis - My Heart is Yours #2

Good evening, and welcome ....Another card from that fabulous DeeDee's Digi My Heart is Yours set.  Used the same papers & design as the earlier card, just reversed the paper position, and used the 2nd image from the set. Another 'get er done' card, as my friend Lynn would say. BTW- the top paper is from a Recollection 8.5x11 Valentine paper pack, 50% off in the local Michael's. Bottom is 12x12 sheet - Paper Studio from Hobby Lobby.


- printed 2 digi images, fussy cut one.  WoS pens on the basket hearts. Actually there were more pink hearts than shown, but the WoS pink made these look red.  Then a stylus added a bit of shaping; adhered the top basket to the MFT pierced circle image which had just a smidge of DI Spun Sugar on the outer edge.

- sentiment from an old stamp, same DI spun sugar for ink. Think it might have looked better with a darker ink shade, but it is what it is. The die is from a Sue Wilson set and the tiny hearts were an  MS punch that has multiple sized tiny hearts...and used a snippet left from this card. All these bits & pieces are in a pile. {Sigh...I had sorted all the snippets into my colored boxes very recently. Sure can't tell it just now}. White c/s snippet embossed with the tiny hearts E/F, colored with copics. (Avery Elle Elle-ments angle die)

Received this link in an email this morning, and thought I'd share.
http://www.youtube.com/embed/__Hz-eaj3x0?rel=0There's a very pretty song to enjoy, and the singer explains how she came to write this song, about the memories of her childhood. (sounded as though she had a lilting Scottish accent). Think I've previously shared that I have 5 older brothers  (2 who have left us). These fellas are stair steppers - 2 years apart - and grew up on my Grandmother's farm. Not much money, lots of hard work, but they still had time to play country kids' fun. Have heard these stories all my life; as I listened to the words of this song, I could just see those 5 little boys in my mind, and got a little misty. Both the brothers who bother with the computer sent me this song today. Hope you'll enjoy it too & perhaps have some happy memories.
 
As always, have a great evening, and thanks for joining me. Hope you're able to stay cozy & warm where you may be. God Bless & Big Hugs.

2/03/2015

DeeDee's Digis - My Heart is Yours

Good evening & thanks for joining me. First let me welcome 3 lovely new followers:

Vickie of Stamp Smiles
Pauline (Cotnob) of Crafting with Cotnob

Thanks so much for becoming new followers & it's always such a pleasure to meet new friends. I hope some of my blog buddies will give a look-see at each of these blogs. I've seen these bloggers at so many other blogs that I visit, and it's quite an honor to have them come join me! Check 'em out, folks!

Now, to share a picture of the Heirloom Stamp Convention we attended this past Saturday.


My sweet blog friend, Sheila H. (lalacrafts) and I met up once again. You may remember that 2 years ago, we met each other by chance at this convention --- recognized each other by our blog pictures. This time it was an arranged meeting, and oh, we both had fun. (I'm the left green shirt, and Sweet Sheila is on the right. Had just gotten a haircut and boy did I get clipped! Well, it will grow). Sheila was there with her friend Patty, and it was a treat meeting another friendly card maker. Enjoyed some great old family stories about our grandparents and the life styles lived in their era. The dies that came home were entered into the database this afternoon, and only had one duplicate (at least that I found!). Managed to pick up 2 of the same Impression Obsession heart die.
 
Now, on with today's card, which is a really cute pre-colored DeeDee's Digi My Heart is Yours. and this set is so reasonably priced at $2.25. This was another 'easy' card and since I have several more Valentines to get done, you can bet you will be seeing more of these DeeDee's Digis .


 - DeeDee's Digi My Heart is Yours precolored image, die cut with an oval;sky & grass sponged with ink pads & daubers. Scribbles of copics added grass texture and shading done on bears and hearts. WoS on the red hearts.
 
- Recollection Valentine paper pack (Michaels on sale - bottom dp) and Paper Studio design paper- top dp.
 
- Avery Elle Elle-Ments angle die. Same die used to cut a white snippet that was colored with a red copic and adhered to hide the paper join. QuickKutz Sweethearts EF embossed the strip.
 
- DeeDee's sentiment is part of the My Heart is Yours set. Used a fishtail die to trace the shape and hand cut.
 
- Glossy heart was punched from a snippet of red paper, then 2 coats of Ultra Thick Embossing Enamel (UTEE) was applied. Red rhinestone trim. Told ya it was easy!
 
I'm so happy to report all the blog candy winners have received their candy, and I think everyone was pleased with what I selected. Now will be working towards the next milestone!!
 
Ya'll stay warm, and come back when you can stay a spell. Hugs.


2/01/2015

Jolly Santa - Christmas Card Club

Hello & welcome. The challenge for our Christmas Card Club was selected today by our sweet Lorraine of Rainey's Craft Room. Lorraine wanted to see Jolly Santas. Once again, a pretty card sent to us many years ago, serves to meet this delightful theme. Here we go:


- Front of an old Victorian looking Christmas card was die cut with the S/B Floral Ovals. The largest die in the set was required to get as much of this sweet picture as possible, so that didn't leave much space on the A2 size card for added embellies. Distress Ink Vintage Photo shaded around the decorative edges and gold pearls for just a bit of bling. (BTW, wasn't sure how well this intricate die would work on the cardstock, so used the back of the recycle card to test for cut-ability. Now there is a cream white oval to use as a mount for something else! Used several passes for the die, but it did cut nicely).

- Foiled paper is from a 12x12 pack of Paper Studio Christmas paper bought some years previously. Thought the gloss of the foil papers looked pretty with the gloss on the Santa & child.

- MS & SU punches for the border trim. That's it...quick & easy, and another old Christmas card sent along for another to enjoy next Christmas. Lorraine, thanks for a fun challenge.

Please do visit my team members - whose blogs can be found on the right side bar.

I do have some lovely new followers to welcome, but will do that in my next post. Yesterday was an all day fun outing at an Heirloom Stamp show, (and yes, I was VERY bad, but it was fun). We left early, got home late, and were very tired. Saw some local friends, met one of my terrific blog buddies too. Gosh, I can remember shopping all day, going out that night. Well, I think I remember...maybe I'm dreaming!

Have a wonderful day and ya'll come back when you can. Hugs